Word-by-word commits with Git?
I’ve been using Git for a while to manage and version any prose that I’m working on (including pieces like this). But recently I’ve been frustrated by its limitations.
There are good arguments out there presenting reasons for creating “atomic commits”, and I agree with these in principle. Where I differ is that I don’t think the arguments go far enough.
Git’s been designed with code in mind, and therefore its basic concern is changes at the line level.
Yes, there are commands like git diff --word-diff which will show changes within a line. But when it actually comes to working with patches, hunks, commits… You’re forced into the line-by-line approach again.
I’ve been exploring these problems lately and trying to come up with some kind of solution.
Writing process
For much of my personal writing, I write longhand, with a pen and paper. And when I sit down to write, I often write the date and time to mark the time at which I’m working on any given section.
So when I type up a draft from my handwritten manuscript, I tend to type it section by section and commit it to a Git repo as I go. When I commit a section, I also use the author date value to record the date I wrote on the manuscript itself. (The commit date simply remains the date I’m actually committing the change. If you’re not sure what I mean by this, there’s plenty of information about author date values vs commit date values out there.)
But as I type, I often scribble down things I want to change. Sometimes I add words, or remove them; sometimes I correct mistakes. Because I’m a little bit obsessive about seeing my process develop over time, I also note the date and time that I make these little scribbles.
Finally, I go through my typed versions and make the edits on the file too. Again, these edits are committed separately with their own author date values.
So, putting to one side the initial writing process, my typing process for a manuscript has roughly three stages:
- Type up my longhand draft from the manuscript, section by section, committing each one with the author date from the manuscript..
- Make edits on that longhand manuscript by hand, as I reread (sometimes while I’m in stage 1).
- Type each edit as a separate commit, with the author date value corresponding to the time I scribbled the edit on paper.
There are big limitations with the third step.
An example of typed edits
In practice, it’s a pain to stop every time I make an edit and commit it. Typing and committing are different types of activities and I’d rather deal with one and then the other. So I tend to type up all the edits together and, afterwards, commit them one by one.
That’s when I hit problems. By the time I get to committing my edits, they can all get mixed together.
Let’s look at an example.
Consider a page from a hand-corrected manuscript of The Adventures of Augie March by Saul Bellow.
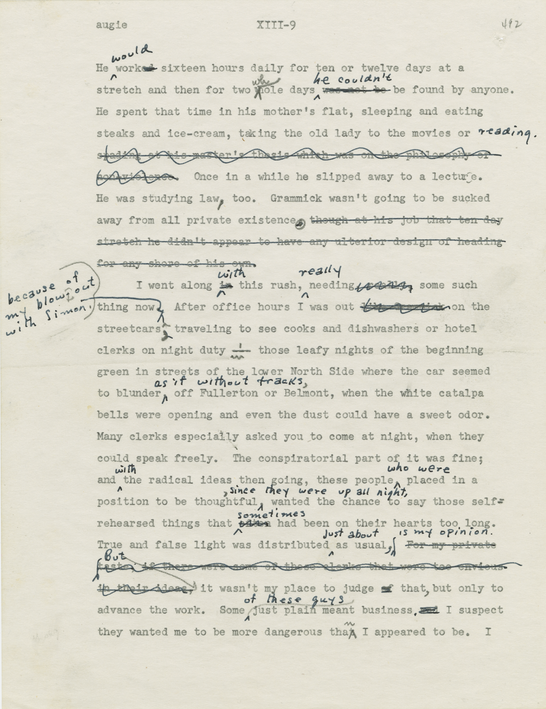
Suppose the typed text in the manuscript is actually a plain-text file – we’ll just consider the first paragraph for now.
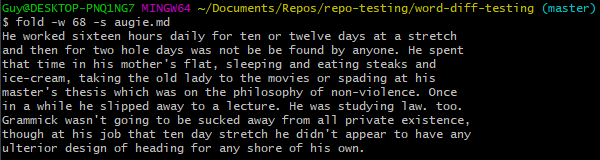
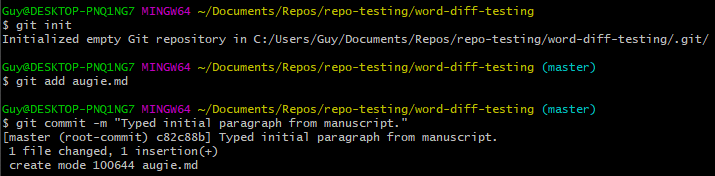
We can then commit this file as the first draft.
Let’s make some changes to the file, based on the handwritten bits from Bellow’s manuscript.

If we want to see the changes against the original – the plain-text digital equivalent of Bellow’s crossings out and scribblings we have to use git diff --word-diff.
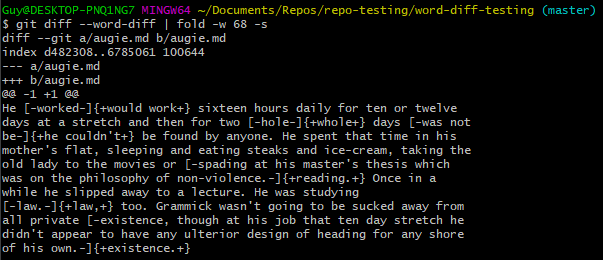
It’s great for working with prose to see changes at this level.
But what if we want to commit some of these changes and not others?
Working word by word
In the example given, all the changes take place within one paragraph from the manuscript. For Git, a paragraph is effectively seen as a line – and a line is the only level which you can edit to.
If, having used git diff --word-diff, I then try to use git add -p to actually stage a particular hunk, I’m presented with the line-by-line view again.
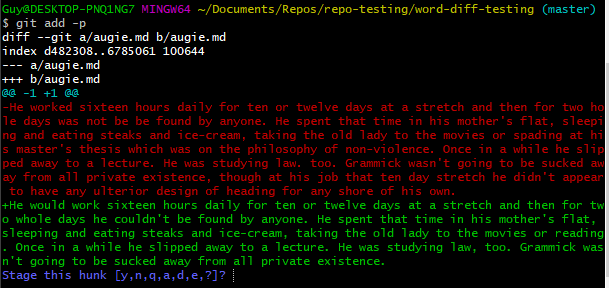
This is a nuisance even if you have only one change within that long line. Edits can be buried within long lines and it’s hard to then seen if the hunk is one you want to commit or not
But, on top of that, if you have more than one change, any edits within a single line that you want to commit separately (perhaps with different datestamps) require complicated staging – you basically have to go and edit the hunk for staging, undoing all the edits you just did.
This is a nightmare.
What I need is an edit where I can see what’s changed on a word-by-word basis (as one can with git diff --word-diff), but also at the same time stage and commit those individual differences separately.
First try: viewing hunks
First I checked StackOverflow and found some help on using word diffs when adding a patch:
git -c interactive.diffFilter="git diff --color-words" add -p
Only, unfortunately, it didn’t work for me. I got this instead:
fatal: mismatched output from interactive.diffFilter
hint: Your filter must maintain a one-to-one correspondence
hint: between its input and output lines.
I’ve been unable to find help with this, although I left my own question on StackOverflow to see if anyone could explain.
Second try: modifying Git core
I didn’t get an answer to my question on StackOverflow but further searching turned up what looked like helpful advice in a blog post by developer and writer Nick Cody.
The advice there was to modify the core of Git itself so that when examining hunks for staging, you can see a --word-diff style output there automatically. That would then make it easier to decide what to do about each hunk.
For those that want to follow this approach, I had to determine where Git execution files were being kept, using git --exec-path (it was /usr/lib/git-core on my hacked Chromebook, and C:/Program Files/Git/mingw64/libexec/git-core on my Windows 10 desktop). I got this to work on my Chromebook, but not on my Windows machine.
In any case, I didn’t follow up – what it made me realise is that I was asking the wrong question. It’s not enough to see the word-by-word changes when staging hunks.
After all, when you open that hunk for editing in any editor, you’re still left with a line-by-line view to work with. I was wondering if there might be text editor that can be used in conjunction with this hack to make the line by line comparison work?
I’m not alone…
At least one other person has experienced this problem – how do you selectively commit changes within a line while ignoring others?
I don’t have an answer for now, but I have a couple of workarounds.
Workaround #1
This one’s a simple one.
I save my text files in a Markdown format. When you work in Markdown, two line breaks typically indicate that there’s a new paragraph.
One line break is usually ignored (unless you put a couple of spaces on it to show the line break is deliberate).
So the really simple solution is to put one line break after the end of each sentence, and two at the end of a paragraph.
This means each sentence is on a separate line in your raw Markdown file (which might have benefits of its own when it comes to editing) but they all get run together as one breakless paragraph when you render it as HTML.
Doing this doesn’t solve the problem – you can still have multiple edits within one sentence, of course – but it does make the likelihood of the problem much lower.
Workaround #2
The other workaround is much more laborious – which is exactly why it isn’t a really solution.
-
Open two Git Windows side-by-side.
-
Use
git diff --word-diffin one of the windows.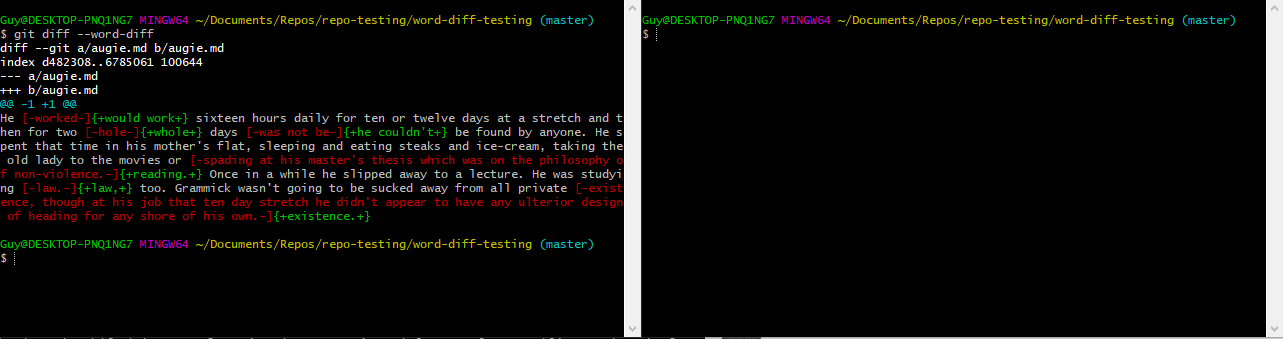
-
Use
git add -pin the other window.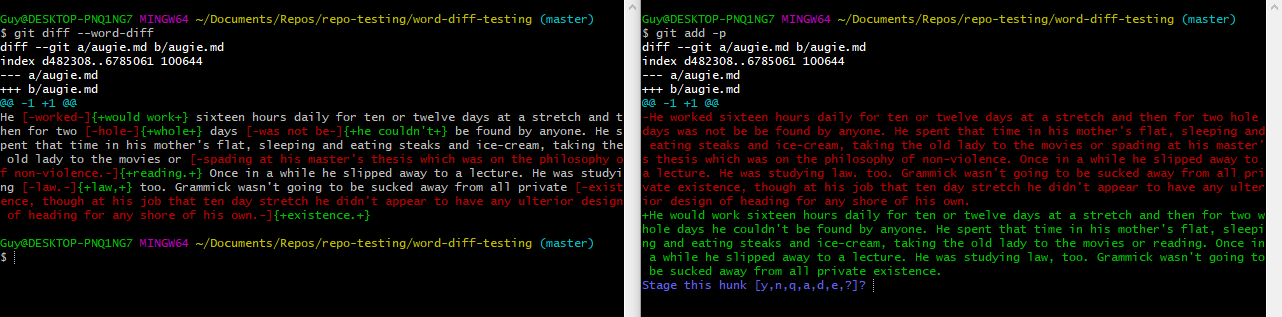
-
Use
sto split the hunk as needed and hone in on the line you want. (In this case it’s not necessary, as we’re dealing with one “line” and hunks can’t be split any smaller than that.)
-
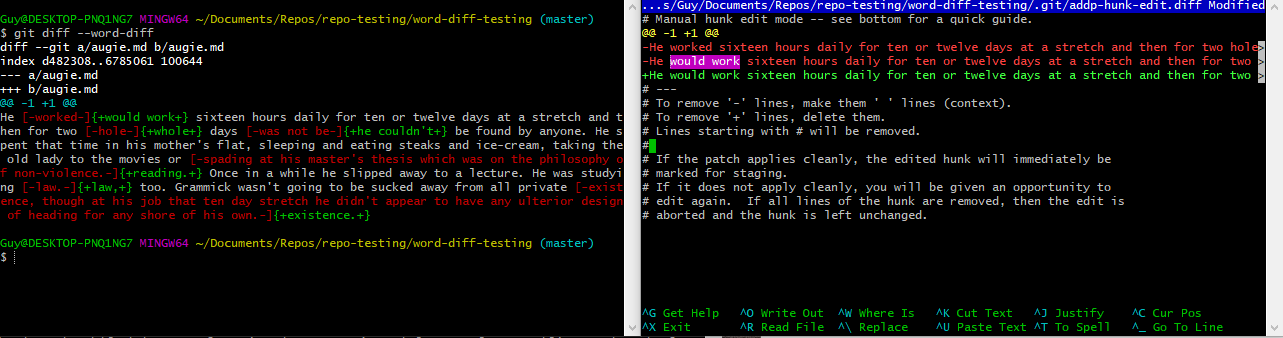
Once you have the line, hit
eto edit this line. This will immediately open a text editor – in my case, I’m using Nano.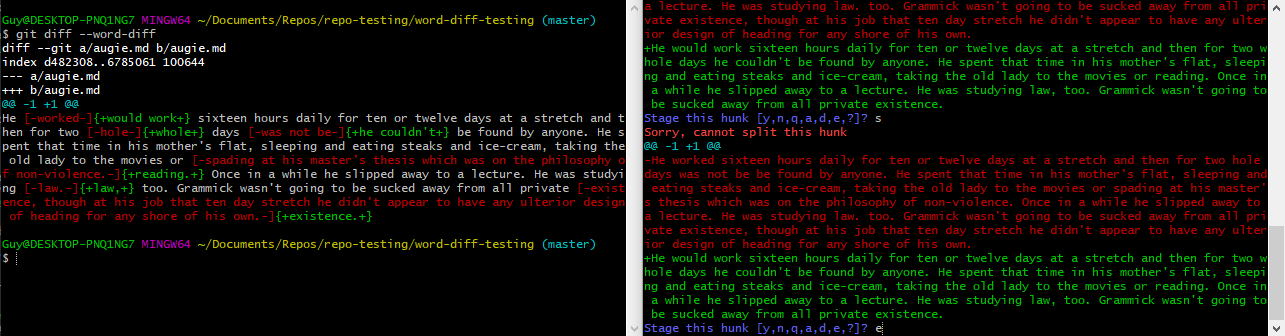
-
Copy the top line, which is the original. (In Nano, I select the whole line and then use keyboard shortcut
Alt+6)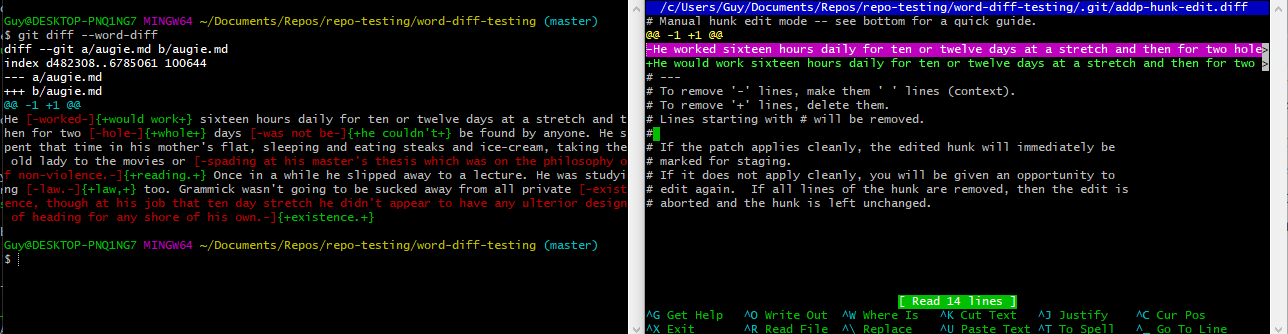
-
Paste between the top and bottom line. (In Nano,
Ctrl+U.)
-
Change what is now the middle line to feature just the changes you want (copying from the bottom line if needed).
-
Delete the bottom line. (Highlight and
Ctrl+Kfor cut.)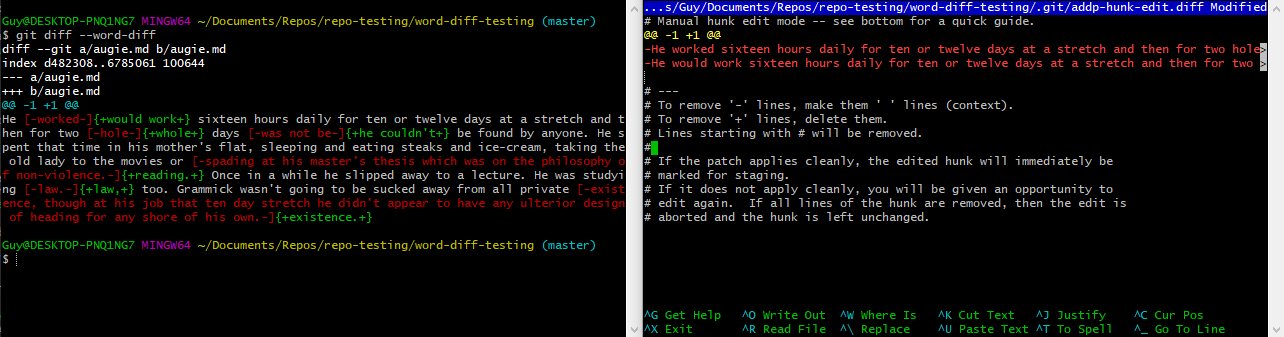
-
Change the symbol in what is now the bottom line from
-to+.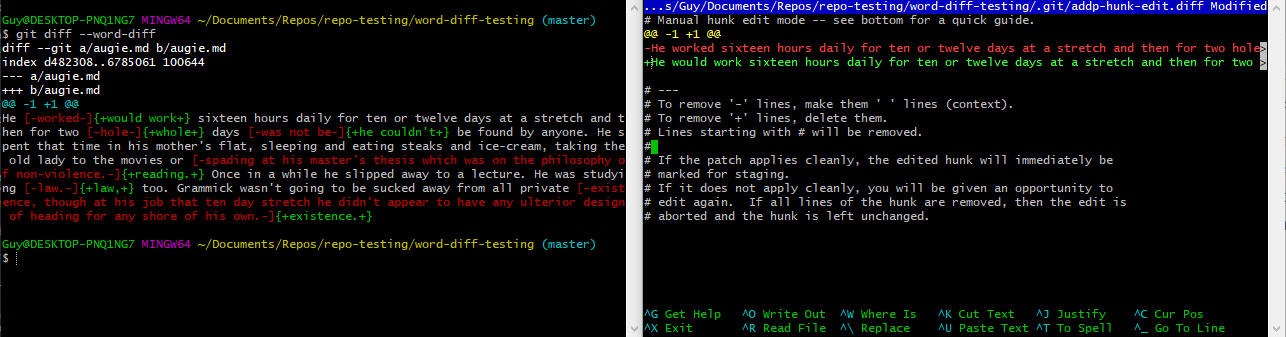
-
Save the patch. (
Ctrl+Xto exit which then prompt you to save withYand hit return to confirm the patch name.)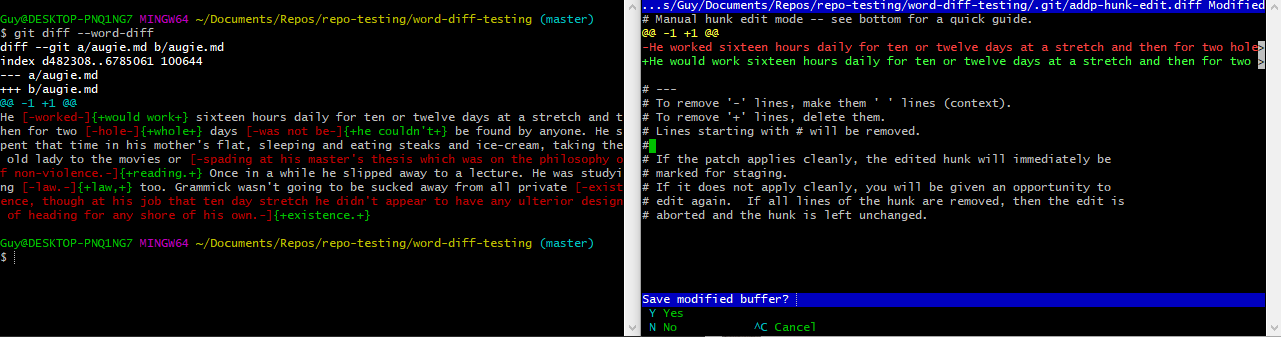
-
Verify your change is as you want it with
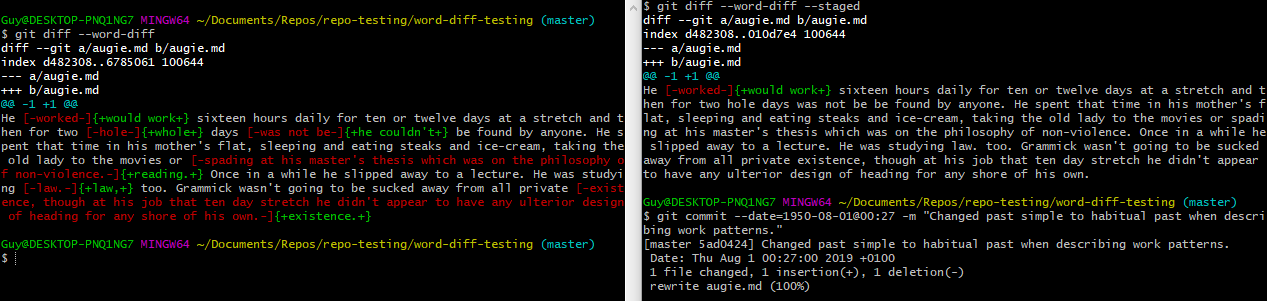
git diff --word-diff --staged.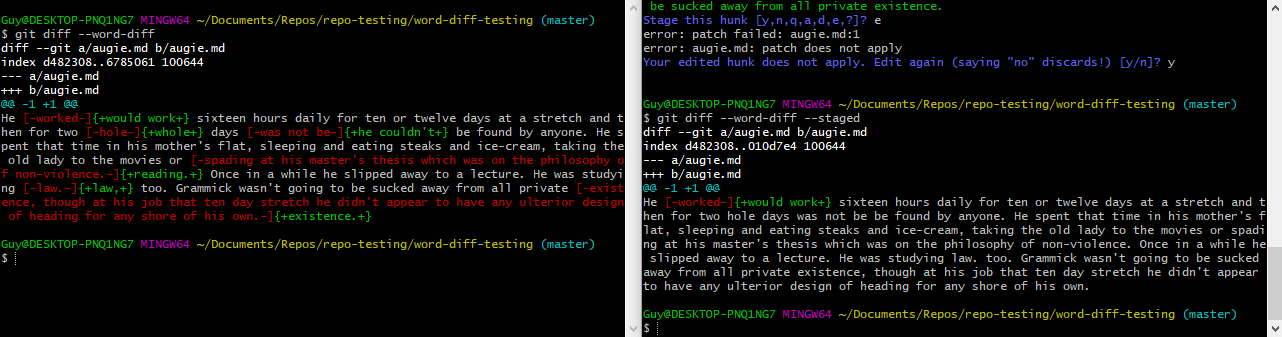
-
Commit your change. I’ve speculated as to when Bellow may have made this one particular edit.
This might seem over the top if you were going to do this for every individual change, but it shows how separating one change from the others in a line can be done in principle.
Dreaming of atomic hunks…
It would be great to have a frictionless process for doing all the above steps – a UI maybe, in something like Atom, where all the word diffs are shown and you can simply key in (or select with a cursor) the ones you want to stage, then stage them!
Perhaps there’s something out there and I’ve missed it. But I’ll continue to work like this when I need to until I find a better solution or create one.