Using Trello to reach consensus
A few weeks ago, the new content team that I’m now a part of was tasked with putting together the beginnings of style guide. The style guide would act as a point of reference for us when needing to produce web content with a consistent style. It could then also be used to guide others who might produce content outside the team.
I was, in my role within the team, partly responsible for managing this process and identifying a way we could put something together quickly but that would take into account thoughts from across the team and the need to debate some of the thornier issues.
I decided to try using Trello for this. Having just returned from a short holiday this week, I’ve decided here to reflect on this approach, outlining the original problem and describing what Trello is and how it became clear that Trello was the right choice.
The problem
As a newly formed content team, my colleagues and I had a number of challenges on our hands. We had to decide how we were going to work within our team for a start. And, despite only having just come together, we have a number of items to deliver over the next month and a number of items which are dependencies for that delivery.
One such dependency is a style guide. We need to produce a large amount of content within a very tight deadline and, although we now technically have enough people to do the job, we all need to be able to work together to ensure that what we produce as a team is consistent and of a high quality. A style guide would help us do this.
What we did last time
In a project that ran from October 2014 to just before Christmas of that year, we did not have such a style guide.
We had legacy guidelines left over from previous efforts to produce consistent content. But there were many gaps and there were areas we did not agree with. We needed a style guide but we had no time to create one in advance of the actual writing. So we created one as we went along.
At that time I created a Google sheet, where team members could log decisions they were making as they wrote. If a team member wasn’t sure what to do about an Oxford comma or the capitalisation of some term, they could make a decision there and then and log in the sheet so other team members knew.
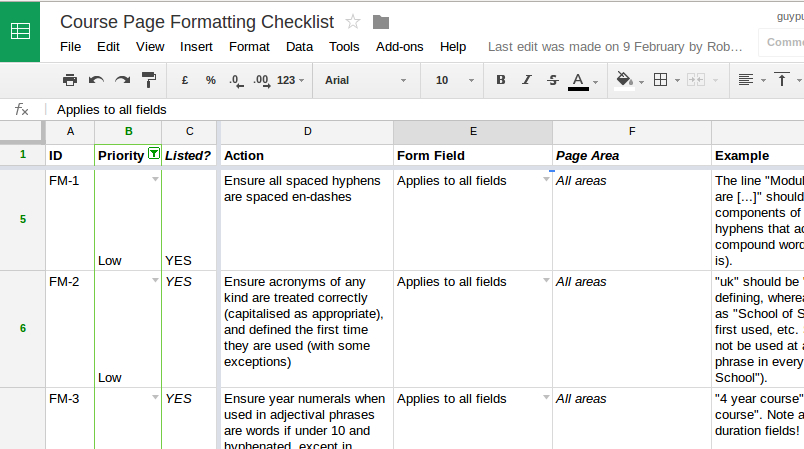
For each decision on the sheet, I created a corresponding column in a long checklist of pages we were creating and editing. Once a page conformed to a decision, the cell in that corresponding column could be ticked off for that page.
In this way, even as new decisions were made halfway through the project, we could see exactly which pages had been proofread for those decisions and which we might, at some stage, need to go back over to do again. Proofreading became, by necessity, iterative.
Using the Google sheet was a fix to the problem of having to create a rough-and-ready style guide as we went. It worked but it was a far-from-ideal solution in far-from-ideal circumstances. It gave us a checklist but not a style guide we could reasonably share with others.
Cutting ourselves some Slack
When the new team came together in January of this year, discussions about style started happening early on. The team is split across two offices, so we have tended to communicate via a tool called Slack. It’s a great way to lighten the email load, share files, and communicate random and informal tidbits as well as posting more considered arguments.
I created a channel in our Slack group called “#style-and-pedantry”, where we could specifically discuss issues that bothered us. One long-running discussion centred on whether we should use “per cent” or “percent”. (I won’t say which side I came down on, but in the end we decided we would go primarily for an actual percentage symbol, “%”.)
As discussions developed in this channel, it became difficult to keep track of what was being decided. Sometimes, decisions weren’t even being made; issues were being debated without seeming to have any possible conclusion.
Slack is a great tool but it’s not clear that it can be used for this kind of complicated decision-making. And I was wary of creating another checklist in Google sheets. Last time, it had been a necessarily quick fix; this time, we hadn’t started writing and we had a little time before the beginning of the project to prepare a guide in advance.
That’s when I decided to try out Trello.
The solution
I’d used Trello before. One of my colleagues had too and it was he that reminded me of its existence and suggested we might use it for project management. We have started using it for aspects of project management within our current project and I’ll perhaps say more about that in a later post.
The revelation for me came when I figured we could use it for reaching consensus on our style rules and for producing the guide as well.
Laying your cards on the table
Trello relies on a system of cards. You can think of them like index cards or cue cards. You can write a title and text on them but you can also leave comments on them.
You can create a lists in Trello where you put your cards. I sometimes call them streams. They’re columns in the Trello interface and you can call your lists what you want. The point is it’s very easy to move and sort your cards through the lists you’ve created, by dragging and dropping them to where you want them to be.
Lists and the cards within in them belong to a board. You could think of it as a table onto which you’re laying the cards in columns. What the cards are for and how you use them within these constraints is up to you.
Formulating rules
I decided that the title of each card should be, where possible, a succinct (one- to ten-word) summary of the issue. The description would contain the decision on that issues. To give a recent example:
Date conventions
21 July 2014 (day month year; no commas).
In ranges, we only need to repeat those parts of the date format that differ:
21 – 28 July 2015 21 July – 3 August 2015 21 July 2015 – 20 July 2016
Write 21st century but 21st-century boy; fourth century BC; AD 2007, 2500 BC, 10,000 BC.
Use figures for decades: the 1960s, the swinging ’60s and so forth.
Always include a space between the year and the designation: AD 2007, 10,000 BC.
You can see here that the top line, the header, gives an idea of what the issue is and thereby what the card is about. The description then reflects how to treat this issues.
The point was to refine the description to the point where everyone could agree on it. Although we continued to thrash out some of the issues on Slack, the description helped us focus on the actual issue and the comments on each card were used to successively refine this description.
Democracy in action
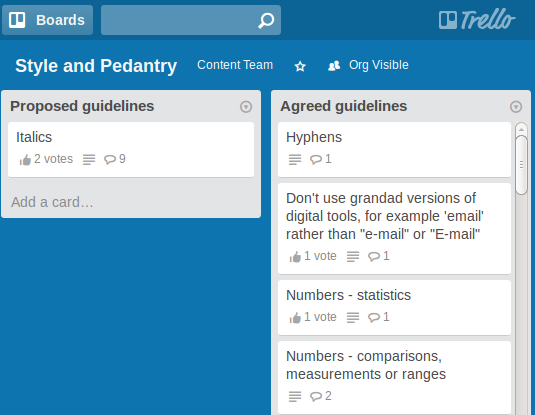
I created just two lists on our “Style and Pedantry” Trello board at first: “Proposed Guidelines” and “Actual Guidelines”. Cards were created in the former and once reached agreement we moved them to the second list.
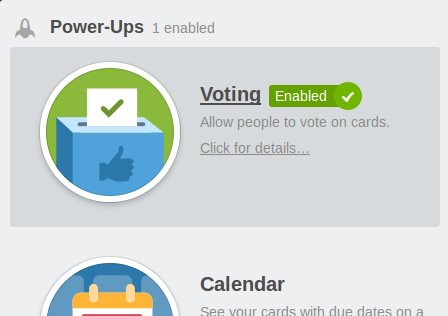
There are seven of us in the team, so we agreed that a card could be moved from “Proposed” to “Actual” once it got four votes. We used one of Trello’s power-up features for voting to do this through the interface itself rather than depending on having to do this in a pre-arranged arranged meeting.
This managed to resolve most of the issues and any left in the “Proposed” list were actually discussed in a meeting. But voting in Trello as we went enabled us to focus on the most contentious issues and also see how close they were to resolution.
We were able to have this meeting at 3pm on the Tuesday our guidelines were due to be passed up beyond our team for review. A few cards got left behind but what was in the “Agreed Guidelines” gave us a good start.
Producing a guide
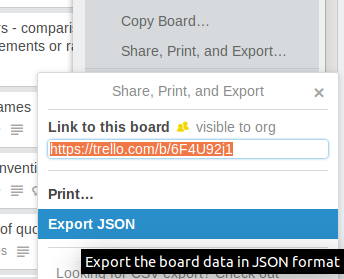
After all the possible cards had been shifted into the “Agreed Guidelines”, I used a script I wrote to produce the guide that needed to be sent up for review.
This used Trello’s “Export JSON” feature, which gives you a .json file you can save locally.
My script ran via Node.js and used the locally saved version to serve a webpage based on this data. The webpage itself was based on Markdown that was run through the Node module marked. It was less fuss than trying to wrap the data in strings of HTML code, and it ensured I kept the web-styling separate from the content.
It was then easy to save the document as a webpage or copy to Word for easy digestion by those who wanted to review the outcomes of our work.
Conclusion
Voting to a deadline, discussing anything really contentious and then exporting the results from Trello for delivery worked so successfully we’ve decided to iterate the process. As we keep thinking up issues we add them as cards to our “Proposed” list on Trello, discuss there, vote and then meeting again on 3pm at Tuesday to battle out any remaining issues. It means we have a constantly improving document to inform our writing.
What next?
We’ll continue to iterate on this document. It seems to successfully pool the intelligence of every member of the team and reduce the energy spent on arguing certain points or on trying to remember what had been decided in some previous conversation.
We could also do with making use of other Trello features, like labels to help collate our style guide. This may be something we explore soon.