Hygiene for your Node package: readme, versioning, and badges
You’ve already built your Node package and published it to the Node Package Manager site. Perhaps you even followed my last post on the what, why and how of building Node packages to do this. But you’re ready to start making improvements and you don’t know quite how to start. This is a guide on some basic things you might be missing and how to include them.
You’ve already built your Node package and published it to the Node Package Manager site. Perhaps you even followed my last post on the what, why and how of building Node packages to do this. But you’re ready to start making improvements and you don’t know quite how to start. This is a guide on some basic things you might be missing and how to include them.
Add a readme file
There are things I didn’t cover last post that make crucial additions to your Node package. One of the most obvious is a README.md file, which I’ll call “readme file” from hereon out.
At worst, readme files can be mere “hygiene factors” for your package. But at best they can actually serve as a motivator for using the tool and they can provide the central focus to the other improvements you might like to make.
Hygiene factors
For those who don’t know what a hygiene factor is, you can read the Wikipedia page on Frederick Herzberg’s two-factor theory. Or you can imagine the work involved in cleaning your kitchen just so you can use it.
When you clean a kitchen, you’re not adding anything to the kitchen as such. But without undertaking this chore you can’t use the kitchen, not safely anyway. Hygiene factors are like this; they’re the bits of work that need to be there even if their use goes unnoticed. As a recovering bass guitarist, I like to think of the bass in much rock and pop music as being a hygiene factor – most people only notice when it’s not there.

In the case of readme files they provide some reassurance about the package. You’d notice it if it weren’t there. But that doesn’t mean they can’t add value.
Key sections
For me, there are a few sections I look for automatically when I look at a readme file.
- Version. Just knowing that the package/code is versioned is helpful!
- Installation. Clear, simple, short instructions on how to install even if seems as obvious as
npm installput me at ease. - Usage. A short 5-10 line code example of how the package is used is also reassuring and gives me a template with which to start.
- Documentation/information. A link to further documentation or information on how to use the package/code and the various features will help me find out how to do what I’m looking to do.
Versioning your package
A key component of maintaining a Node package once you’ve built it that I didn’t cover last post was versioning.
The Node Packager Manager (NPM) tool on the command line actually makes these really easy. You just need to understand semantic versioning first.
Semantic versioning
Here I’ve attempted to provide a summary of how semantic versioning works although you may want to read the official page on semantic versioning to get more detail.
In semantic versioning, the version for a package consists of a series of three numbers separated by dots:
- The first number is the major version number. This should only need to change when some feature is broken or has been replaced affecting compatibility.
- The second number is the minor version number. This should only change when new features are introduced or when features are deprecated so that the changes are backwards-compatible.
- The third number is the patch version. This should be used only for fixes; nothing fundamental about the features should change.
It’s possible to include further numbers and details after these three but that’s not essential.
When a version number for a package is changed, it’s quite common to say the version is “bumped”.
NPM version command
NPM has a command for handling versioning baked into it. You can simply write npm version followed by type of bump you want to make to the package and it will update the version number for you.
So for the types of “bump” mentioned above:
npm version majorwill change the version number from, for example,1.0.0to2.0.0. This tells the user that if they have written code for version1.*.*of your package, it may not work if they upgrade to2.0.0.npm version minorwill change the version number from, for example,1.0.0to1.1.0. It lets users of the package know that their code should still work but there are additional features or deprecated features that they can rewrite their code around.npm version patchwill change the version number from, for example1.0.0to1.0.1. It suggests that something has been fixed in the package so this is an improvement to the code that should require no adjustments by the user.
All these commands will both tag your Git repository with the latest version number and update the version number in package.json to ensure consistency for the release.
Readme and versioning
You may want to tie the version number bump into your readme file. After all stating the version number up front in your readme file is useful. But you won’t want to have to remember to manually update the readme file everytime you use npm version. So you’ll have to use additional script to handle this.
A reminder about scripts
If you read my preceding post on building a Node package, you may recall that there was a section on the scripts part of package.json. This is a place where you can specify shortcuts to run commands for you. For example you can specify the command test in this way:
"scripts": {
    "test": "mocha"
}
With this code in your package file, you can use the command npm run test (or actually, in this particular case, just npm test for short) and it will run Mocha automatically for you. This way whatever testing suite you use, a user of your package only has to type npm test to get the report.
Automated versioning
It’s also possible to piggyback off existing NPM commands, like npm version. By specifying a script for “version”, you can have NPM run additional commands on top of the usual versioning work that it normally carries out.
For example, imagine adding a version script to package.json that prints the message “Bumping version…”
"scripts": {
    "test": "mocha",
    "version": "echo Bumping version..."
}
As you might recognise from the example in the code, it’s simple command-line syntax that the script properties expect. Running npm version will not only bump the version number as usual but with this version script in package.json it will also print the message “Bumping version” to tell you it will.
Versioning variable
We can actually use a variable to make this version bump message more informative:
"scripts": {
    "test": "mocha",
    "version": "echo Bumping version to $npm_package_version"
}
Using that dollar-prefixed variable will now print the new version number on the end of the message.
Rewriting the readme
We can use this approach and the variable to automate the updating of the readme file.
For example, I originally added the version v0.0.0 to the readme file in my dickie-dates package. To change that version number automatically when I used npm version, I wrote the following script in a file called version.js.
var fs = require("fs")

fs.readFile("README.md", "utf8", function (error, data) {
	if (error) throw error
	var bumped = data.replace(/(\d+\.\d+\.\d+)/g, process.argv[2] || "$1")
	fs.writeFile("README.md", bumped, function (error) {
		if (error) throw error
		console.log(process.argv[2] ? `Bumped readme file to ${process.argv[2]}` : `Version number not found.
	})
})
This script reads the readme file and replaces anything that looks like a version number the new version number.
Packaging the script
The script relies on an argument being passed to it – hence the use of process.argv[2] in the code above. The variable process.argv[2] will either be the new version number or it will be undefined, in which case the code will simply use what was there before ($1).
To make this work, the script file version.js needs calling from the "version" property within the scripts section of package.json.
"scripts": {
  "test": "mocha",
  "version": "node ./version.js $npm_package_version && git add README.md"
}
Note that the version.js script is called using the node command, that the environment variable for the package version number is passed to it, and that the changed README.md file is staged with git add. The normal operation of npm version takes care of the git commit after the file has been staged.
You can read more about this on the NPM page on adding scripts to the version command.
Version badging
In the code given above, my version.js file will look for anything that looks like a version number. This could be quite dangerous as it may pick up numbers that look like versioning numbers in future instances of the readme file.
Targeted updates
The problem code is the regular expression /(\d+\.\d+\.\d+)/g which looks to replace any three sets of one or more digits separated by dots.
One way to help prevent this would be to make the string that needs to be replaced more specific.
You may have noticed that many readme files use neat little graphics to show build status and other information about the site.
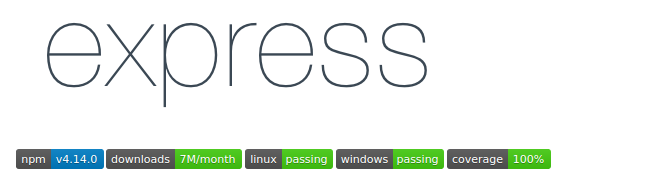
We could use this approach to present the version information more neatly and to make our replacement script more targetted.
Using shields.io
The badges can be created automatically using the website shields.io.
By creating an address based on just three components – subject, status, and color – you can get an image for your readme file immediately. The address takes this format:
https://img.shields.io/badge/<SUBJECT>-<STATUS>-<COLOR>.svg
You can try this out for yourself using the Shields.io “Your Badge” form.
Take the version number we asked our build script to handle. Rather than adding this as raw text to the readme file we could instead ask Shields.io for an image that contains this information:
https://img.shields.io/badge/version-0.0.0-gray.svg
That address will give us the following image.
![]()
You don’t want to have to manually test and then update these yourself each time – this is the perfect candidate for something that can be added to your package.json scripts.
Rewriting version.js
First we can replace v0.0.0 (or whatever the version is) in the original readme file with the appropriate Markdown code for displaying an image from sheilds.io:

The file version.js then needs updating to find this specific line within the readme file and replace the version numbers within this line of Markdown code with the new version number. This is much safer than targetting a set of numbers as the numbers are likely to appear for reasons besides versioning, meaning the script risks replacing these too.
To make the script more targetted, the regular expression needs changing first:
/(!\[Version )(\d+\.\d+\.\d+)(\]\(https:\/\/img\.shields\.io\/badge\/version-)(\d+\.\d+\.\d+)(-gray\.svg\))/g
This regular expression looks for our Markdown image line but with any version number. As you can see in the visualisation of the regular expression below, it also groups the line it finds into parts so that we can target just the numbers for change and keep the rest.

Groups 2 and 4 as captured by this regular expression are the ones to be replaced. So the replace function in version.js can be adapted to reflect this.
var bumped = data.replace(/(!\[Version )(\d+\.\d+\.\d+)(\]\(https:\/\/img\.shields\.io\/badge\/version-)(\d+\.\d+\.\d+)(-gray\.svg\))/g, `$1${process.argv[2] || "$2"}$3${process.argv[2] || "$4"}$5`)
This will now make the automated updating of README.md more robust and more aesthetically pleasing.
Summary
In this post, I’ve covered:
- The importance of adding even a simple readme file, as a hygiene factor.
- Semantic versioning and using it for your Node package.
- Combining the two by writing an automatically updated version badge on your readme.
For what it’s worth, you also learned that I used to play bass guitar.
There are other ways to do the things described in this post, packaging and build tools that will allow you automate it similar ways. But I wanted to write about the principles and basics behind these hygiene factors without getting bogged down in explaining other packages, and the best way to do that seemed to be to use as vanilla techniques as I could think of.
You can see all three things implemented at the Node package I described creating in my post on creating your first Node package. That package is called dickie-dates and can be found at:
Next
In this post, I’ve explored the reasons for creating a readme for you package and a way to version your package – and then I’ve pulled the two things together.
Originally, I wanted to write more about badges and something about continuous integration too, binding the results of automated testing into your readme file. But that looks to be a separate post.
In the meantime, I also have some specific improvements I want to talk about making to my dickie-dates package.