Rapid prototyping with Gathercontent – how and why we do it
In the last six to seven weeks, we’ve changed the way we create websites in our team. We’ve dropped a lot of the time we spent building and re-building pages and we’ve re-focused our efforts on content, by following a new model. That new model involves “rapid prototyping”.
What’s “rapid prototyping”?
At the time of writing, Wikipedia’s page on rapid prototyping describes it as “a group of techniques used to quickly fabricate a scale model of a physical part or assembly using three-dimensional computer aided design (CAD) data”.
But this post is about creating content for websites. So it might sound like a misnomer to describe the process I’m about to describe as “rapid prototyping”.
However, if ignoring the usage of “physical” and “three-dimensional” in describing the concept, there are many aspects of rapid prototyping that are useful in describing the process I’m about to outline, namely:
- Building up a product using layers of material
- Creating production-quality parts without the usual costs (or “unfavourable short run economics”)
- The quick fabrication of a scale model for testing and review
Three problems
Before we started trying rapid prototyping, we faced three main problems:
- Controlling content
- Showing stakeholders that content
- Creating rigorous architecture
I think it’s worth saying a little bit more about each of these points to explain what I mean.
1. Controlling content
We wanted content to be controlled and go through a proper editorial workflow without design being a distraction or a hindrance.
We’d learned from previous projects that documents and whole webpages can actually be very complicated items when it comes to editing and approving. For example, there might be some sections that are factually correct and well-written from the beginning, while other sections await fact-checking and approval. Sometimes, just one section might hold back the approval of an entire page – even though we know that the rest of it is okay.
I was interested to see what we could do break pages down into components, each of which could be in a different stage of a workflow, so we would have a better and more systematic understanding – beyond our memory, rough notes, and informal comments – of what was good-to-go and which parts required further work.
2. Showing stakeholders
We wanted, nonetheless, a way to show stakeholders what we were working on as we went.
At every stage, we wanted to be able to show stakeholders what the finished webpage would actually look like so that both the process and the product we were building weren’t too abstract.
Creating actual webpages in a CMS (or at least in our CMS) can be extremely time-consuming. But in the past, when we’ve showed stakeholders plain-text content or something that didn’t look like what they were eventually going to get, it all felt too abstract and unreal.
It’s fair to say that working with plain-text content, while purer and freer from distraction, is abstract and unreal to us as well. All of us in the team understand the principle of separating form and content and the idea that content should lead form. But it’s very difficult to finalise what you’re working on until you can see the effect it has on that form.
In a recently unpopular British phrase, we wanted “to have the cake and eat it”.
3. Creating rigorous architecture
Finally, I wanted a cheap method for standardising the way that the code for the eventual site would be generated.
Once you create page in our current CMS, you have free reign to insert whatever code you like into the main body of the page. This can lead to inconsistent and messy use of headers and other elements. Enforcing a more disciplined approach would not only require a lot of effort and overhead but would also detract from the main focus of each project – that is, trying to produce high-quality content.
One solution to this problem of freedom would be creating ever more restrictive templates within the CMS. But in doing that, we would not then have the freedom and flexibility to play with the information architecture as we discover new ways of presenting the content.
Such templates would be too rigid whereas I wanted to allow freedom while enforcing rigour when it came to the end product.
Existing solutions
GatherContent all by itself can solve the first of the aforementioned problems of controlling content through a workflow. The challenge is using GatherContent and its workflow in a particular way.
Regarding showing content to stakeholders in particular ways, GatherContent does allow you to export content a number of different formats. But none of these formats achieved what we really wanted
There are also connectors to hook GatherContent up to Sitecore and other CMSs. Unfortunately, for various reasons, we were unable to use these so we had to resort to other means to show people what we were working on. This is possibly a solution for the future though.
In the meantime, I wanted to create a way to get the content out in the form that we wanted it and to do that I had to think about a new model for writing within the team.
Templates vs layouts
I’m about to talk about “templates”. But when I say “templates”, I mean the forms that one can create with GatherContent.
Confusingly, it is also common to talk about webpage designs as templates too – we even do this in our team when referring to basic framework for pages that we use within the CMS for consistency.
So, to save confusion, I’ll refer to the design templates as “layouts” instead.
All our layouts and the colour pallettes that accompany them were designed by the designer I used to work with in the old Digital Development Team, Rob Sterlini, who no longer works for us. In fact, we don’t have a designer or even a central Digital Development Team anymore, so we’ve been very much dependent on these layouts from a few years ago.
Rob Sterlini’s website mentions his work on these still very serviceable layouts and showcases other design work of his too.
Our new model
Our new model of working up content for webpages in GatherContent began from the principle of working with the smallest possible unique components that we could.
These simple components are then used to build up pages and then a site.
Smallest possible templates
I created a number of very simple templates that the team could use to create the building blocks of a page. Allow me to give you a quick tour of three of them.
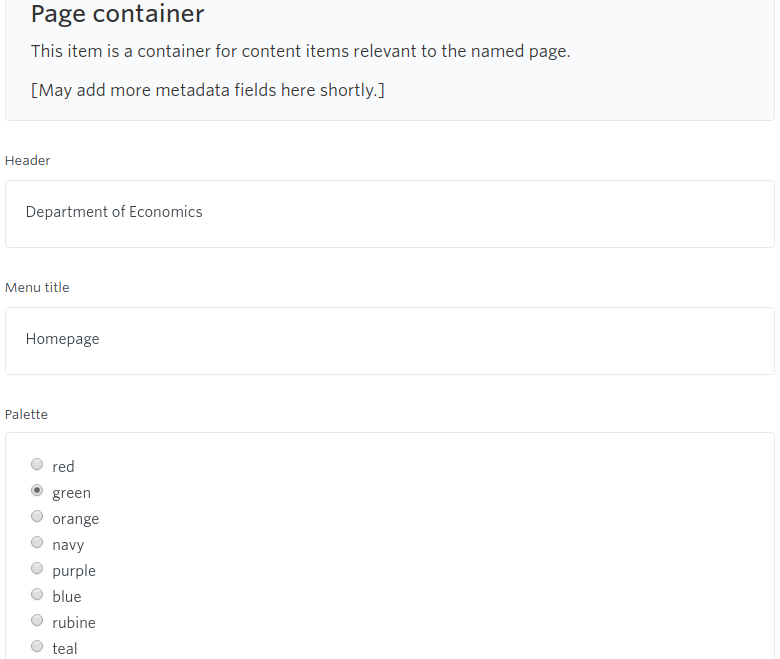
“Page container” template
The “Page container” template contains only three fields:
- A field for the header of the page. This creates the h1 and the title page, replicated the functionality of our CMS.
- A label for how this page should appear in the menu of the site.
- A choice of different colour pallettes which would determine the CSS stylesheet to be used in the CMS.
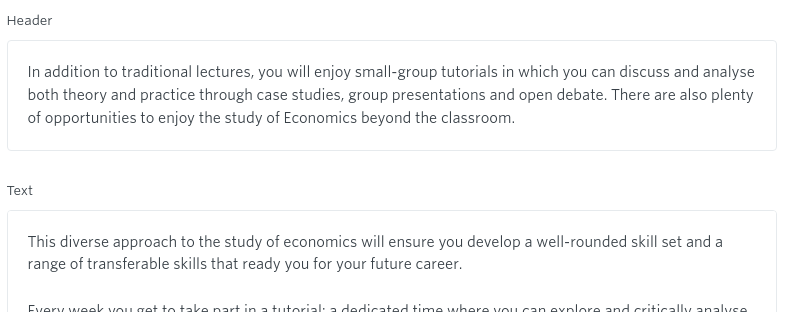
“Body content chunk” template
The “Body content chunk” has been the most ubiquitous of the templates we have used in our GatherContent projects and it’s also the simplest. It has just two fields:
- A “header” field to contain text for an HTML header (that is, tags
<h1>through<h6>). - A “text” field for a chunk of rich text to appear under the header.
The actual level of the header (whether it should be an h1 or and h2 or whatever) is determined by the chunk’s position within the project hiearchy on GatherContent. This bit is crucial to understanding our approach to architecture so I’ll come back to it later.

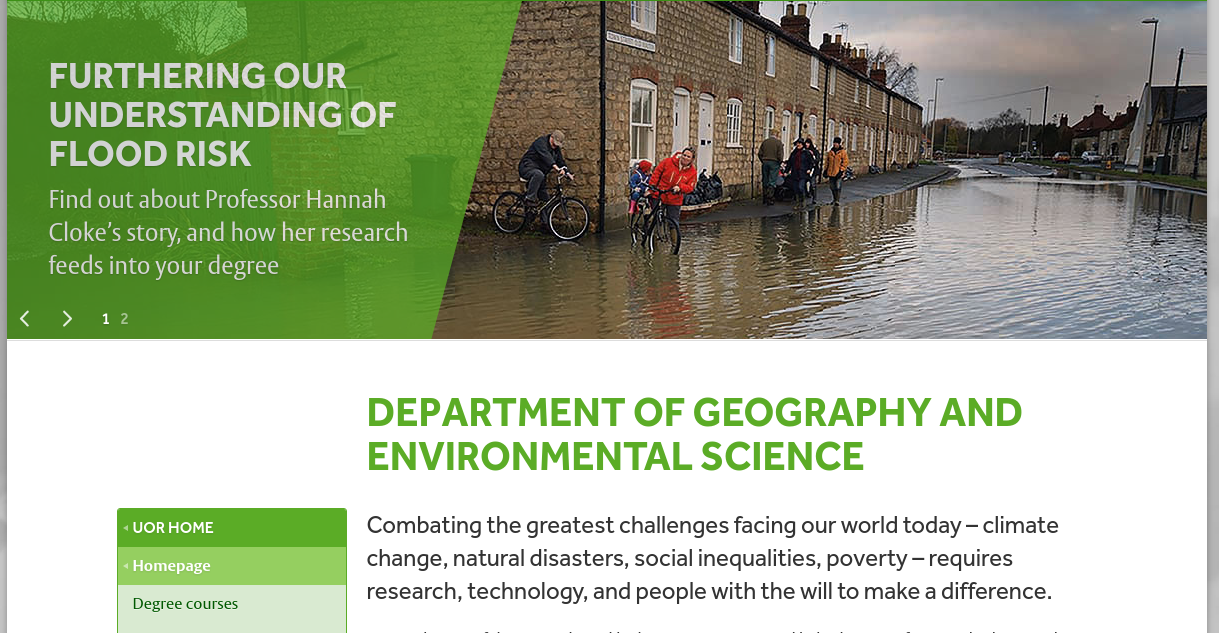
“Banner and message” template
The “Banner and message” template consists of just four fields:
- An attachment field for adding an image to the top of the page.
- A plain-text field for the headline to be used within the banner.
- A plain-text field for the strapline to appear under the headline.
- An optional plain-text field for a URL which can be used to make the banner a link, if desired.

How we rapidly prototype – a walkthrough
In order to help both team members and stakeholders realise what each would do, I created a Node JS script that generates instant prototypes based on the information in GatherContent.
Here’s how it happens.
1. Prototyping a page
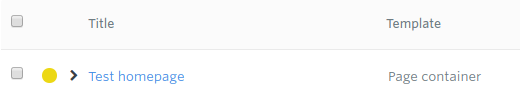
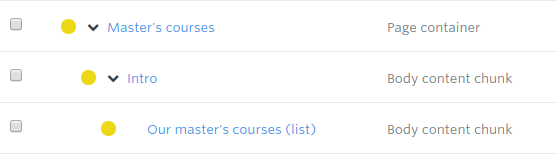
In order to start creating a site, we create a new project in GatherContent and we add a new item based on the “page container” template. This will then become the “homepage” for the site.
We can then create items using other templates to make up the content of the page. These items need to be nested under the page item in GatherContent, in order to appear on the item in the rapid prototype.
2. Structuring a page
There is a key concept to grasp in order to successfully structure a page though. The level of nestedness for each determines how it is treated in the prototype.
The page container’s header field will determine that page’s h1 text and the title. And the header of any body content chunk nested directly beneath the page item will be an h2 on the page.
Crucially, if an h3 and accompanying text is needed, a body content chunk should be nested under the h2-level item. And for an h4 and accompanying text, the item should be nested under the relevant h3-level item and so on.
3. Structuring the site
So far I’ve described the way that one page can be built up from several simple building blocks using our model. But I haven’t yet described how to create a site in this way.
Creating further pages as part of a site is actually a simple extension of the logic I walked through in the preceding section. When a team member wants another page, they simply create a new item using the “page container” item, give it a header, and nest it underneath the page item it belongs.
A top-level page item should be nested under the homepage item. But it’s possible to nest page items under other page items and thus create a site structure.
4. Restructuring a site
It’s therefore quite simple and to restructure a site at this stage, as we are simply dealing with prototypes.
We can simply using the re-ordering function in GatherContent, change the ordering and nestedness of the items, save and then see the change instantly in our prototype.
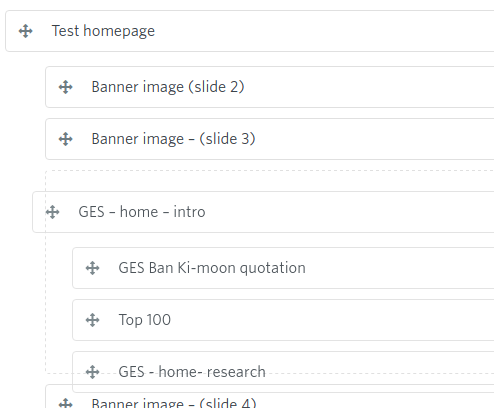
In this way, items can be moved up and down pages or even moved from one page to another. No code needs to be changed; the level of headers sort themselves out according to whatever new shape the hierarchy of items is in.
5. Showing (or not showing) stakeholders
One of the main problems we trying to solve was that of being able to show stakeholders early and often what the pages would look like as we were developing them, without the time-cost and overhead of actually creating them in the CMS.
It was important, therefore, that we had a workflow that could allow approved items through to the prototyping stage – and crucially drafting stages earlier in the workflow where we didn’t want a mocked-up version to be visible yet.
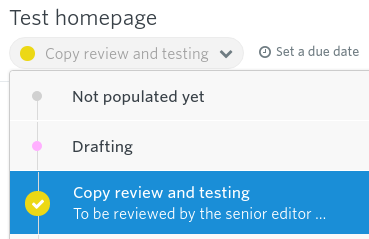
Quite simply, if we want something to appear in the prototype, we make sure that item is in the “Copy and review” stage. That way it will be picked up by the prototype.
But if there is an item we’d rather did not appear in the prototype, even if it’s just a small block of text in one item, we can knock it back to a drafting stage.
Successes and … areas for further development
By following this method, we effectively solved the three problems I mentioned at the outset. We now have tighter control of content by having broken pages down into several components that might be at different stages of editing or approval.
We have a quick and easy way to show stakeholders at regular intervals what we’ve doing.
And because the design elements and more technical aspects of the architecture are taken care of by code in Handlebars layouts and partials, we have been able to introduce cleaner and more rigorous code without much fuss.
Besides that, there has been another benefit.
Other benefits
A standard project for a site is set to take eight weeks.
In previous projects, a lot of time was taken up building and rebuilding items in the CMS and we couldn’t always easily share what we’d made with stakeholders.
Now we spend six to seven of the eight weeks, working on and checking the content in GatherContent and by the end of the project, the stakeholders have seen what the site should look like, and crucially had several chances to feed back, before we go ahead and build it.
That means the build portion of work can happen in the last week or two of the project in one go. In future, it means we can even separate out this work and task somebody besides a content writer with it. But that’s thinking ahead.
Current shortcomings
Having said all that, the process at the moment is not problem-free.
By creating items at such a small level (one for each header and chunk of text, one for each signpost, and so on), the project structure can quickly become unwieldy.
GatherContent’s reordering feature helpfully allows groups of nested items to dragged in one go. Unfortunately, it doesn’t yet allow for expanding and collapsing of items so that if one has a long list of items and lots of nesting, it can be very hard to get a sense of the overall project and where everything is when reordering.
So I’m now looking at ways of improving the process and consolidating some of the very simple item templates we have.
Avoiding technical details
I deliberately haven’t gone into the technical detail of the scripts I’ve written here. I wanted to focus on the way we’ve worked instead.
The script I wrote relies on my HitherContent package.
It also relies on Heroku and Handlebars, all of which were described in my other post on content delivery from GatherContent. Like the script in that post, the prototyper uses GatherContent’s API to take the content it needs and display it in a particular way.
The main differences with this model, compared with the previous model I described, is that the building blocks are much more fundamental and the preview produced is much higher-fidelity – the aim is to have the content resemble as much as possible what the final product would look like.
Each template in GatherContent has a Handlebars layout or registered partial to correspond with it.
Summary
I started this post by describing three problems we’ve been trying to solve. I hinted at other possible solutions but then described the solution we have adopted in our team. This solution has not just solved our three main problems but also suggested a direction of travel for future work.
I deliberately haven’t gone into a lot of technical detail. I wanted to describe the problems I have been working with the team to try and resolve and outline the model we are following when it comes to building new sites now.
In the near future, I hope to share the code I have written to make this possible. When I do so, I will write a more technical post to explain how I’ve done it.